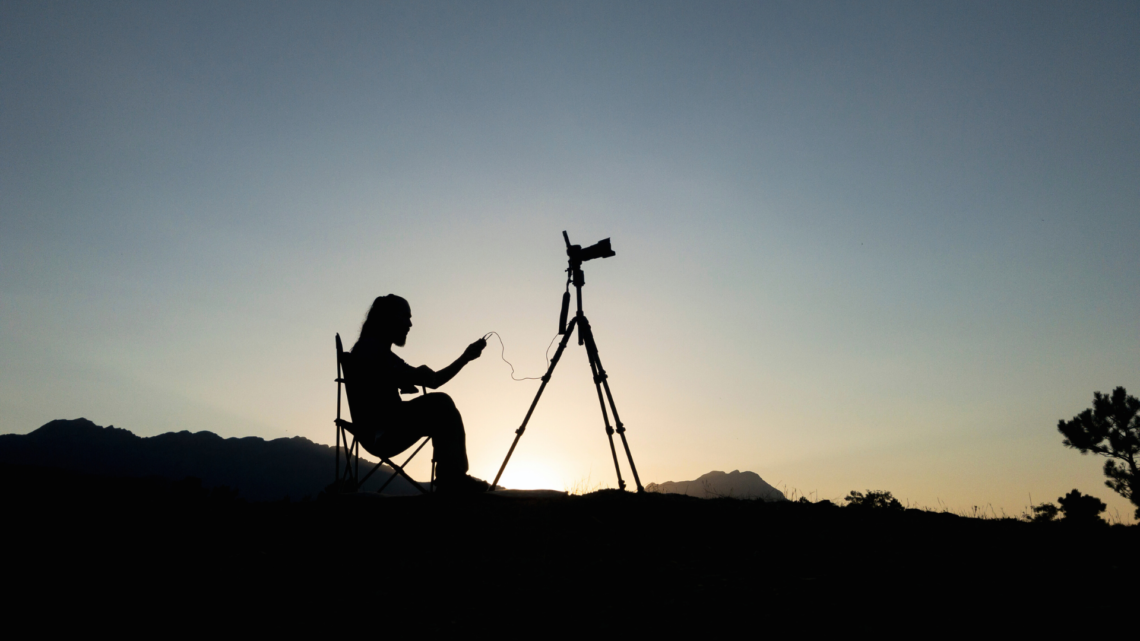
Long exposure photography offers a unique way to capture movement and light, transforming ordinary scenes into extraordinary images. To successfully experiment with this technique, a photographer must master camera settings such as shutter speed, aperture, and ISO. Utilizing a tripod is essential, as it stabilizes the camera and prevents unwanted blur, allowing for longer exposure times.
Adjusting the shutter speed is crucial; keeping it open for several seconds or even minutes reveals details not visible in standard photography. Photographers can explore various subjects, from flowing water to bustling cityscapes, creating striking contrasts between still and moving elements. An understanding of light and timing can greatly enhance the quality of the images produced.
Experimentation is key in mastering long exposure photography. By varying settings and trying different locations or times of day, photographers can uncover stunning results. Whether capturing the gentle blur of waves or the vibrant light trails of passing vehicles, this technique invites creativity and innovation in every shot.
Understanding the Basics
Long exposure photography involves careful manipulation of camera settings. Mastery of shutter speed, ISO, and aperture is essential to achieve the desired effects. Each component plays a crucial role in creating stunning images that capture movement and light.
Shutter Speed and Exposure Times
Shutter speed directly affects how long the camera’s sensor is exposed to light. For long exposure photography, shutter speeds can range from a few seconds to several minutes.
- Fast Shutter Speeds (e.g., 1/500s) freeze motion.
- Slow Shutter Speeds (e.g., 2s, 10s) capture movement, such as flowing water, creating smooth, ethereal effects.
Choosing the right shutter speed adjusts the warmth of lighting and motion blur. A steady tripod is essential to prevent unwanted camera shake during extended exposure times.
ISO and Aperture
ISO measures the camera sensor’s sensitivity to light. Lower ISO settings (e.g., 100-200) reduce noise, producing clearer images, ideal for long exposures. Higher ISO values can introduce graininess.
Aperture controls the amount of light entering the lens.
- Wide Aperture (e.g., f/2.8) allows more light but narrows the depth of field.
- Narrow Aperture (e.g., f/16) permits less light, increasing depth of field but requiring longer shutter speeds to maintain exposure.
Balancing ISO and aperture enables effective light management in various conditions, ensuring the best results in long exposure photography.
Essential Gear for Long Exposure
Long exposure photography requires specific equipment to achieve optimal results. Key components that enhance stability and control will be covered, ensuring photographers capture stunning images without unwanted motion.
Choosing the Right Tripod
Selecting an appropriate tripod is critical for long exposure photography. A sturdy tripod minimizes camera shake, which can be detrimental to image quality. Look for tripods made of durable materials such as carbon fiber or aluminum.
Important features to consider include:
- Weight capacity: Ensure it can support the camera and lens being used.
- Height adjustment: A versatile tripod should easily adjust to various heights for different perspectives.
- Stability: A tripod with a broader base and heavier build offers improved stability in windy conditions.
For maximum effectiveness, a tripod equipped with a bubble level helps achieve precise alignment, ensuring straight horizons in photographs.
The Role of Neutral Density Filters
Neutral density (ND) filters are essential for long exposure photography, primarily used to reduce the amount of light entering the lens. This enables longer exposure times even in bright conditions.
Key points to note about ND filters:
- Variety: ND filters come in different strengths, measured in stops. Common options vary from 3-stop to 10-stop filters.
- Utilization: By darkening the scene, photographers can achieve effects such as smooth water surfaces or soft cloud movement.
- Quality: Higher quality filters maintain color accuracy and reduce unwanted lens effects.
When using an ND filter, it’s critical to adjust camera settings accordingly, allowing for proper exposure and shutter speed.
Remote Shutter and Cable Releases
A remote shutter release or cable release proves invaluable in long exposure photography. It allows the photographer to take a shot without physically pressing the camera’s shutter button, preventing any potential camera shake.
Considerations for using remote releases:
- Types: Options include wired cable releases and wireless remote triggers. Each has its benefits based on convenience and distance.
- Timer functions: Some remote releases include timer settings, enabling the photographer to initiate exposure after a brief interval.
- Compatibility: Ensure that the chosen release is compatible with the camera model for seamless operation.
Incorporating these tools significantly enhances the shooting experience, ensuring sharp, clear images without the interference of camera movements.
Advanced Long Exposure Techniques
Advanced long exposure photography opens the door to exploring unique visual effects. Techniques such as capturing motion blur and light trails can create dynamic images, while experimenting with water and night skies enhances the creative potential of landscapes.
Capturing Motion Blur and Light Trails
Using long exposure to capture motion blur adds a sense of movement to photographs. This technique works well for busy streets where vehicles create light trails.
To achieve this effect:
- Use a Tripod: A stable base is crucial to avoid unintended camera shake.
- Adjust Shutter Speed: Experiment with shutter speeds between 1 to 30 seconds depending on the light available and the desired impact.
- Focus on Focal Points: Incorporate leading lines in your composition to draw the viewer’s eye through the motion.
Light trails from cars or pedestrians can create vibrant patterns. Placing subjects according to the rule of thirds can enhance the overall composition.
Photographing Water and Night Skies
Long exposure techniques dramatically change how water and night skies are represented. For waterfalls or flowing rivers, longer exposures create a silky effect.
To photograph water effectively:
- Select the Right Time: Early morning or late evening usually provides optimal lighting conditions.
- Use Neutral Density Filters: These filters reduce light entering the lens, allowing for a slower shutter speed without overexposing.
For night skies, capturing star trails requires careful planning:
- Long Exposure: Keep the shutter open for 20 to 30 minutes to achieve visible trails.
- Use a Wide-Angle Lens: This allows for a broader view of the sky, enhancing the celestial elements in the frame.
Creative Applications in Landscape Photography
In landscape photography, long exposure techniques can evoke emotion and creativity. By blurring elements like clouds or water, a photographer can convey a sense of tranquility.
- Composition Matters: Use leading lines to guide viewers through the image.
- Experiment with Different Focal Points: Focus can shift throughout the scene for varied effects.
Incorporating the rule of thirds can enhance balance within the composition. This approach not only highlights the elements of the landscape but adds depth and intrigue. Experimentation is key to discovering unique artistic expressions within long exposure photography.
Post-Processing Long Exposure Photographs
Post-processing long exposure photographs is essential for achieving desired visual effects. This phase allows photographers to enhance sharpness, adjust contrast, and utilize histograms for improving exposure balance.
Editing for Sharpness and Contrast
Sharpness is crucial in long exposure photography, where movement can cause blurriness. Using editing software like Adobe Lightroom or Photoshop, photographers can apply sharpening filters.
- Start with basic sharpening: Adjust the Amount slider gently to avoid artifacts.
- Fine-tune details: Use the Radius and Detail sliders to enhance texture while retaining a natural look.
Contrast control enhances image depth.
- Increase contrast: This often improves the mood and detail in both highlights and shadows.
- Use the Tone Curve: A graphical representation to boost specific tonal ranges without affecting the entire image.
Balancing sharpness and contrast enhances the overall impact without losing detail.
Using Histograms for Balanced Exposure
Histograms provide a visual representation of exposure, indicating the distribution of light and dark areas in an image.
- Check for clipping: A histogram that leans heavily towards either side may indicate loss of detail in shadows or highlights.
- Aim for balance: A well-distributed histogram ensures a full range of tones, enhancing image quality.
When processing, photographers can adjust shadows, midtones, and highlights based on histogram feedback.
- Use sliders to fine-tune exposure.
- Adjust whites and blacks: This broadens tonal range without losing detail.
Utilizing histograms effectively leads to more balanced, visually appealing photographs.